Bootswatch のインストール
Bootstrap 3 のテーマを簡単に設定できる Bootswatch をインストールしてみる。Rails 4.x で Bootswatch を使う方法を参照した。
# twitter bootstrap css & javascript toolkit
gem 'twitter-bootswatch-rails', '~> 3.2.0'

# twitter bootstrap helpers gem, e.g., alerts etc...
gem 'twitter-bootswatch-rails-helpers'
$ bundle install
Fetching gem metadata from https://rubygems.org/.........
Resolving dependencies...
Installing commonjs 0.2.7
Installing less 2.6.0
Installing less-rails 2.6.0
Installing twitter-bootswatch-rails 3.2.0.0
Installing twitter-bootswatch-rails-helpers 3.2.0.0
Your bundle is complete!
It was installed into ./vendor/bundle
Post-install message from twitter-bootswatch-rails:
Important: You may need to add a javascript runtime to your Gemfile in order for bootstrap's LESS files to compile to CSS.

**********************************************

ExecJS supports these runtimes:

therubyracer - Google V8 embedded within Ruby

therubyrhino - Mozilla Rhino embedded within JRuby

Node.js

**********************************************
therubyracer が必要ということで、Gemfile に記述する
# Embed the V8 JavaScript interpreter into Ruby
gem 'therubyracer', '~> 0.12.1'
bundle install でインストール。
$ bundle install
Fetching gem metadata from https://rubygems.org/.........
Resolving dependencies...
Installing libv8 3.16.14.7
Installing ref 1.0.5
Installing therubyracer 0.12.1
Your bundle is complete!
It was installed into ./vendor/bundle
Bootswatch の設定
Bootswatch のサイトからテーマを選ぶ。今回はテーマを Flatly に設定する。最初にテーマをインストールする。
$ bin/rails g bootswatch:install flatly
        gsub  app/assets/javascripts/application.js
        gsub  app/assets/stylesheets/application.css
      create  app/assets/javascripts/flatly.js
      create  app/assets/stylesheets/flatly.css
      create  app/assets/javascripts/flatly
      create  app/assets/javascripts/flatly/loader.js
      create  app/assets/javascripts/flatly/bootswatch.js
      create  app/assets/stylesheets/flatly
      create  app/assets/stylesheets/flatly/loader.css.less
      create  app/assets/stylesheets/flatly/variables.less
      create  app/assets/stylesheets/flatly/mixins.less
      create  app/assets/stylesheets/flatly/bootswatch.css.less
      create  app/assets/stylesheets/flatly/base.less
テーマを import する。いくつか上書きを確認されるが、許可する。
$ bin/rails g bootswatch:import flatly
       exist  app/assets/stylesheets/flatly
    conflict  app/assets/stylesheets/flatly/variables.less
Overwrite /Users/hkob/rails/webcit3/app/assets/stylesheets/flatly/variables.les? (enter "h" for help) [Ynaqdh]
       force  app/assets/stylesheets/flatly/variables.less
    conflict  app/assets/stylesheets/flatly/bootswatch.css.less
Overwrite /Users/hkob/rails/webcit3/app/assets/stylesheets/flatly/bootswatch.css.less? (enter "h" for help) [Ynaqdh]
       force  app/assets/stylesheets/flatly/bootswatch.css.less
     prepend  app/assets/stylesheets/flatly/bootswatch.css.less
        gsub  app/assets/stylesheets/flatly/variables.less
        gsub  app/assets/stylesheets/flatly/variables.less
最後にレイアウトを設定する。
$ bin/rails g bootswatch:layout flatly
      create  app/views/layouts/flatly.html.haml
app/asserts/stylesheet/application.css にテーマの読み込みを追加する。
/*
 *= require_self
 *= flatly/loader
 *= flatly/bootswatch
 */
app/assets/javascript/application.js にテーマの読み込みを追加する。
//= require jquery
//= require jquery_ujs
//= require flatly/loader
//= require flatly/bootswatch
config/initializer/assets.rb に precompile の設定を追加する。
Rails.application.config.assets.precompile += %w( flatly.css )
Rails.application.config.assets.precompile += %w( flatly.js )
welcome#index 画面の作成
Bootstrap のテストのためにトップ画面を作成してみる。コントローラを作る前に再度 generator の確認をして、以下のように修正をした。コントローラごとの stylesheet 、javascript、helper については作らないことに変更した。
    # generator の設定 (RSpec)
    config.generators do |g|
      g.stylesheets false
      g.javascripts false
      g.helper false
      g.template_engine :haml
      g.test_framework :rspec,
        fixtures: true,
        view_specs: false,
        helper_specs: false,
        routing_specs: true,
        controller_specs: true,
        request_specs: false
      g.fixture_replacement :factory_girl, dir: 'spec/factories'
    end
root は welcome#index とする。この状態で、welcome index の generator を実行してみる。ただ、routing spec は作成されないようだ。
$ bin/rails g controller welcome index
      create  app/controllers/welcome_controller.rb
       route  get 'welcome/index'
      invoke  haml
      create    app/views/welcome
      create    app/views/welcome/index.html.haml
      invoke  rspec
      create    spec/controllers/welcome_controller_spec.rb
      invoke  assets
      invoke    coffee
      invoke    scss
config/routes.rb に root を設定する。上のget は generator で作られたものである。
Rails.application.routes.draw do
  get 'welcome/index'
  root 'welcome#index'
end
この状態で、サーバを起動してみる。
$ bin/rails s
ブラウザから localhost:3000 にアクセスしてみる。
Internal Server Error

Missing `secret_key_base` for 'development' environment, set this value in `config/secrets.yml`
WEBrick/1.3.1 (Ruby/2.1.5/2014-11-13) at localhost:3000
secrets.yml がないと言われるので作成する(実際には最初に rails new したマシンには入っていた。.gitignore に書かれているため他のマシンにはファイルが作成されなかっただけであった)。
development:
    secret_key_base: 「rake secretで作成された文字列」

test:
    secret_key_base: 「rake secret で作成された文字列」

production:
    secret_key_base: <%= ENV["SECRET_KEY_BASE"] %>
app/views/layout/application.html.haml の内容を app/views/layout/flatly.html.haml の内容に書き換えてみる。ブラウザを表示してみると以下のようなエラーが出た。
variable @zindex-modal-background is undefined
  (in /Users/hkob/rails/webcit3/app/assets/stylesheets/flatly/loader.css.less)
これについては、Rails4.1でBootswatchを試すと variable @zindex-modal-background is undefined エラーが発生に記載があった。このページのように app/assets/stylesheets/flatly/variables.less に以下の行を追加する。
@zindex-modal-background: 0;
この結果、以下のようにスタイルシートが動作した。

このページは表示することはないので、テストで jumbotron クラスを適用してみる。
.jumbotron
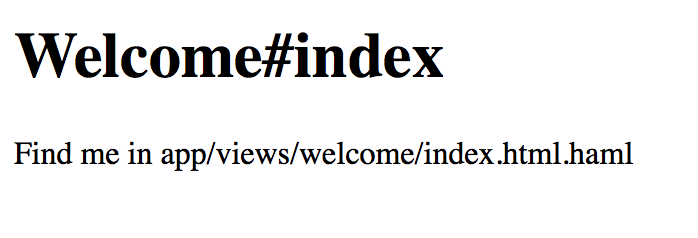
  %h1 Welcome#index
  %p Find me in app/views/welcome/index.html.haml
今日はここまで。
written by iHatenaSync

